Posts

A rumor took hold of many Meta advertisers for the past several years. The claim was that you can’t use the words “you” or “your” in your Facebook ads copy without risk of rejection — or worse.

This theory never made sense to me. I use the words “you” and “your” routinely in my ad copy without any concern or repercussion. But, there has to be some reasonable explanation for why so many advertisers believe it to be true.

I decided to do some digging. And as seems to be the case with most of these theories, there is some sliver of truth. But, not surprisingly, how this rule is applied is misunderstood.

In this post, let’s better understand how this rule is applied and provide some examples of what is and is not acceptable for use of the words “you” and “your” in Facebook ads copy.

Prohibited Personal Attributes

I stumbled on this accidentally while researching prohibited personal attributes related to Facebook advertising. Here is the important passage:

Note that you can use the words ‘you’ or ‘your’ as long as your ad doesn’t mention any prohibited personal attributes and complies with our Meta Advertising Standards.

Here’s the full quote…

Meta Ads Prohibited Personal Attributes

Let’s back up. Meta doesn’t allow advertisers to assert or imply the personal attributes of the targeted audience. Here’s the list of prohibited personal attributes:

  • Race
  • Ethnicity
  • Color
  • National origin
  • Religion
  • Age
  • Sex
  • Sexual orientation
  • Gender identity
  • Family status
  • Disability
  • Medical or genetic condition
  • Physical or mental health (including medical conditions)
  • Vulnerable financial status
  • Voting status
  • Membership in a trade union
  • Criminal record
  • Name

The problem with using “you” or “your” is when it implies that you know that the targeted audience has a connection to one of these personal attributes. You can’t suggest that you know that someone has a disability, has a medical condition, has a criminal record, or is having financial difficulties.

When you do, this is when ads get especially creepy and problematic.

Examples

Let’s go over some examples of uses of “you” and “your” that could get you in trouble, coming from Meta’s own documentation.

In the example above, you can’t assert or imply that you know that the targeted person is 62. That’s why using the phrase “people like you” is an issue. You can still highlight your services and how the business helps seniors, but you need to do so without suggesting you know their age.

Even though the copy is framed in the form of a question, the use of “you” along with a prohibited personal attribute is a violation. Instead, highlight how your service benefits those with disabilities without suggesting the targeted person has a disability.

Similar to the example above, do not suggest or ask whether the targeted person has a medical condition. Instead, focus on your services.

In this example, the copy would be fine if it simply read “Call us for free therapy sessions.”

Again, it’s rather simple. Don’t personalize this. “Our firm has solutions to bankruptcy.” Highlight those solutions.

Instead of asking the targeted person whether they have a criminal record, focus on how your business helps those with a criminal record find a job.

“You” and “Your” are Normally Fine

As you read through the above, the common theme is that “you” and “your” are being used with sensitive issues. Avoid that.

There are bound to be gray areas to avoid. But that doesn’t mean you need to write awkward sentences and throw these words out entirely.

Here are some examples where it would be fine…

Are you hungry?

Are your Facebook ads performing badly?

Do you like to dance?

Do you have your tickets to the game yet?

Save your seat at this conference.

Your dreams have come true.

Do you need a plumber?

When we go through what’s not allowed, it can feel like it’s difficult to write copy that doesn’t violate terms. But as you can see, you just can’t use “you” and “your” in sensitive copy related to prohibited personal attributes.

Watch Video

I did record a video on this, too. Check it out…

View this post on Instagram

A post shared by Jon Loomer (@jonloomer)

Your Turn

Have you run into issues using the words “you” and “your” in Meta ads copy?

Let me know in the comments below!

The post Can We Use the Words “You” and “Your” in Facebook Ads Copy? appeared first on Jon Loomer Digital.

One of my biggest battles with Facebook ads over the years has been driving high-quality traffic when promoting a blog post. I don’t want empty clicks. I want people who spend more time and are likely to perform other actions.

Look, I get it. The vast majority of advertisers are trying to get sales or leads from their ads. And while I do that, too, my blog is also important. I want to drive traffic to it, but it can’t just be any old traffic.

We know that there’s a huge hole in Facebook ads optimization if you optimize for surface-level metrics. If you tell Facebook that you want link clicks, you’re going to get lots of them — but probably not the ones you want.

You see, the ads algorithm doesn’t care about quality. It just cares whether you get the thing you asked for at the lowest cost. And you may get lots of clicks or video views, for example, if weaknesses in certain placements are exploited.

Needless to say, I’ve used a different route to drive quality traffic to my blog posts during the past few years. Still, I wasn’t fully confident that it was doing what I wanted it to do. I just knew it had to be better than the alternative.

A split test was in order.

Let’s take a look at the split test that I ran and what we can learn from it…

Which Optimization is Best?

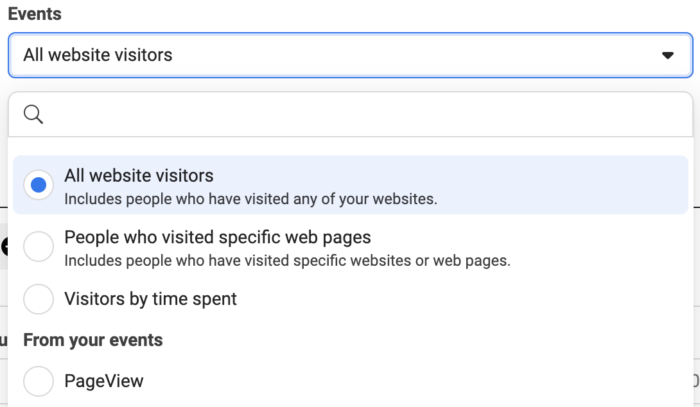
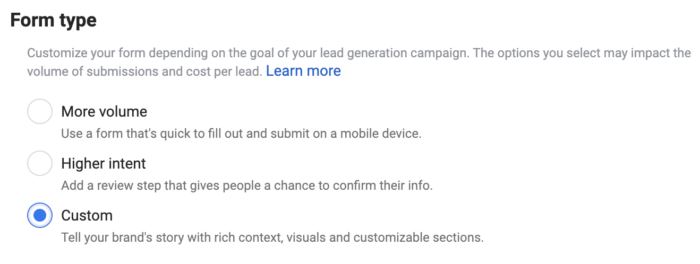
If you set up a Traffic campaign, there are two primary ways that you can optimize: Link Clicks or Landing Page Views.

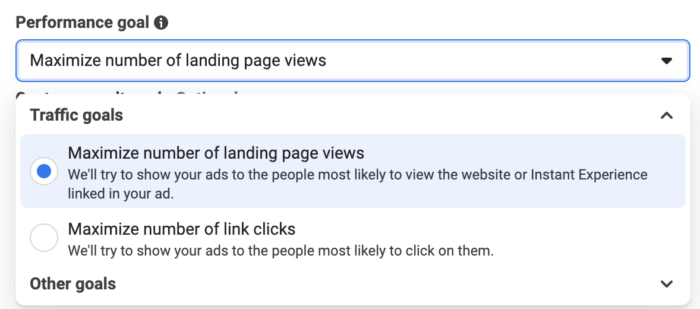
Depending on your choice, Facebook will optimize the delivery of your ads to get you the most link clicks or landing page views at the lowest possible cost. What’s the difference?

Link Clicks are the “number of clicks on links within the ad that led to advertiser-specified destinations, on or off Meta technologies.”

Landing Page Views are the “number of times that a person clicked on an ad link and successfully loaded the destination web page.”

It may sound like semantics, but a Landing Page View actually requires the landing page (and Meta pixel) to load. The Link Click does not. So, the Landing Page View is slightly better.

Slightly. Neither is the definition of a quality website visit.

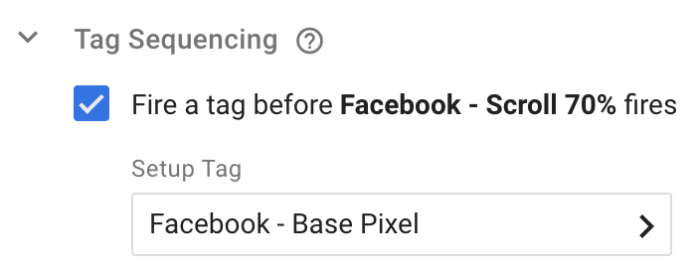
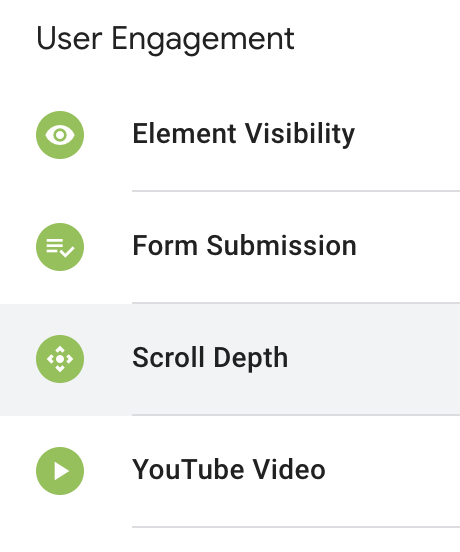
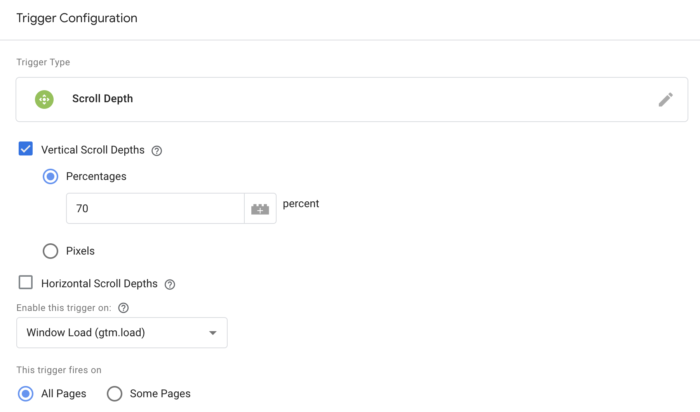
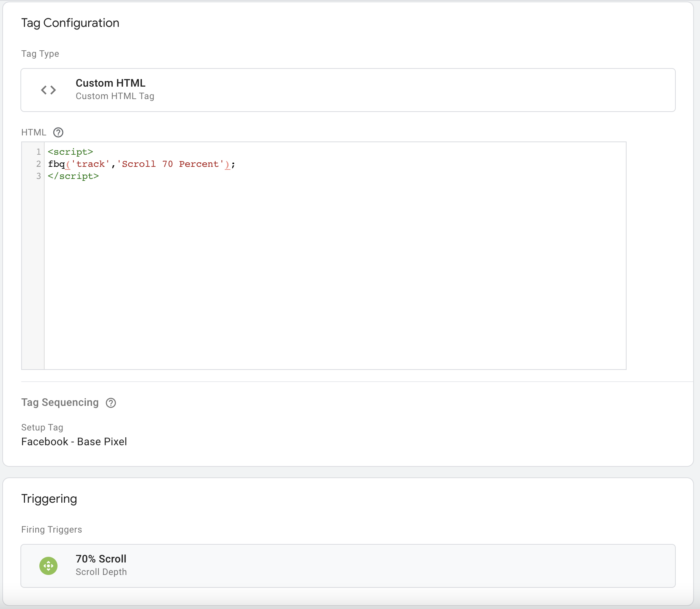
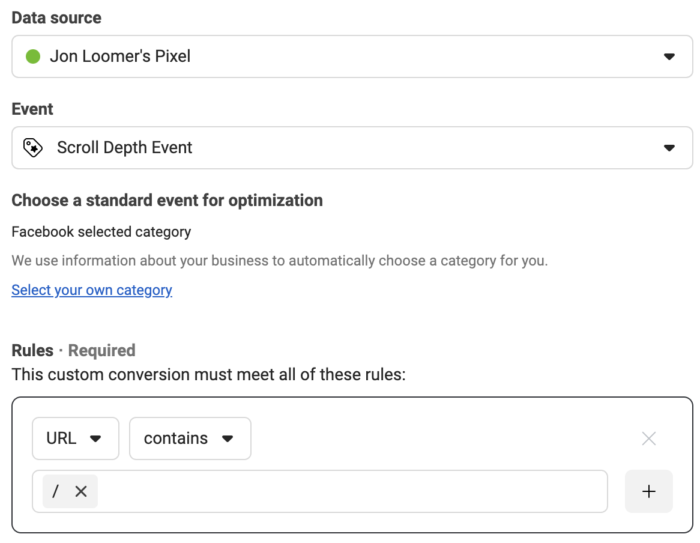
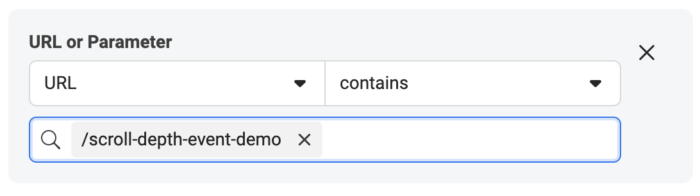
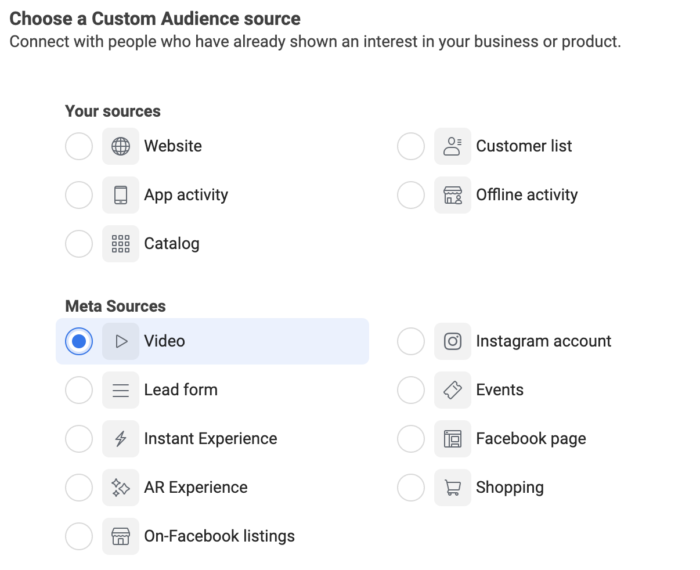
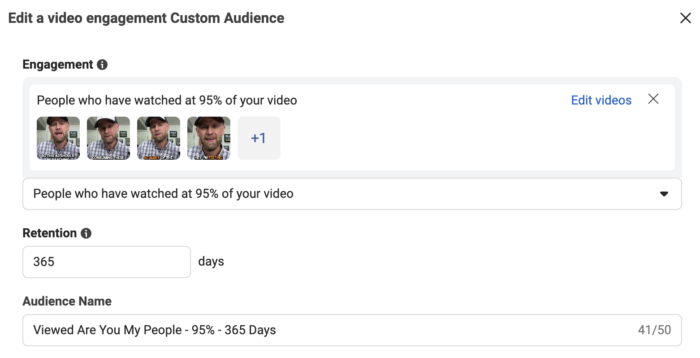
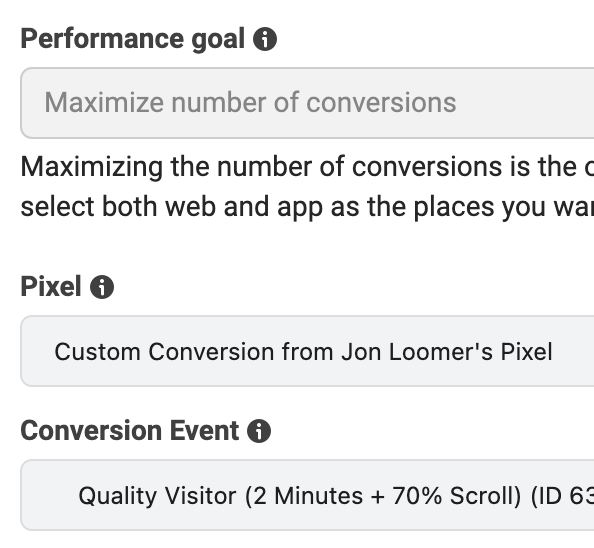
That’s why three years ago, I created a series of custom events that fire on my website when people perform certain actions that might signify a quality website visit. For example, I’ve created events that fire when a visitor scrolls down a page or spends a designated amount of time on a page of my website.

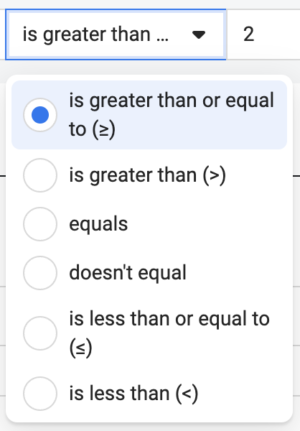
Even better? I created an event that requires you to spend two minutes AND scroll at least 70% down a page.
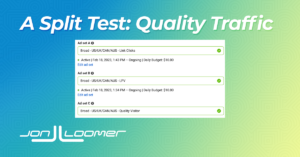
The Split Test

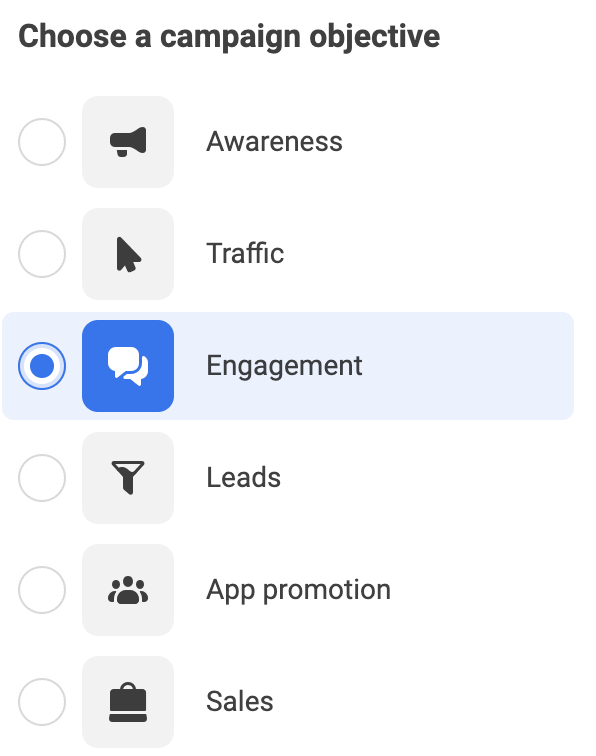
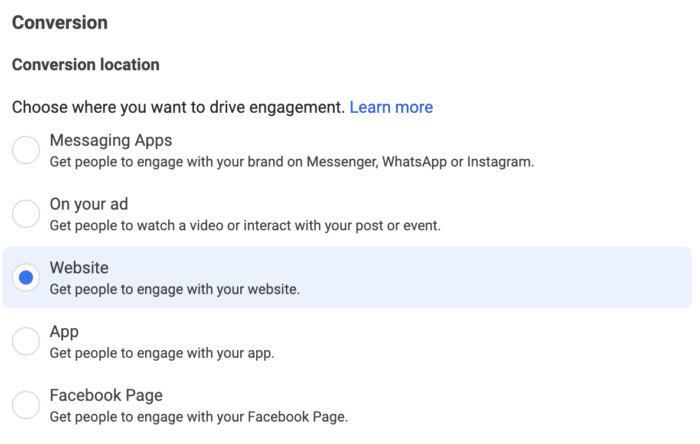
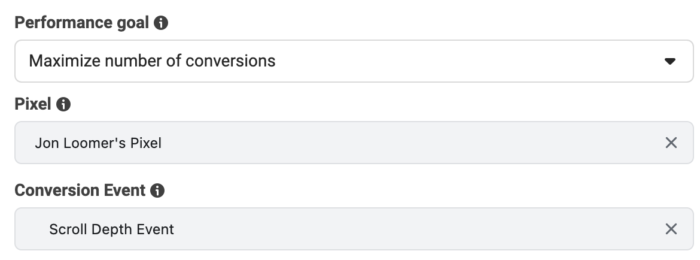
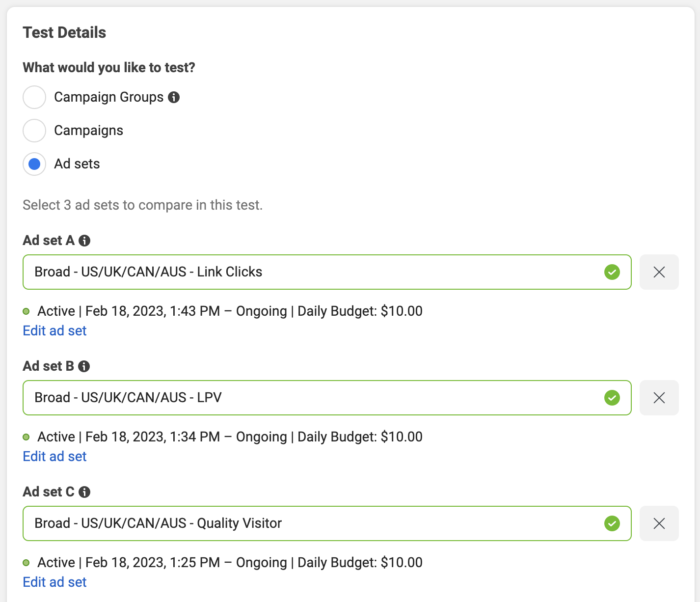
I created a campaign with three ad sets that were identical in every way except for one thing: Optimization. One ad set optimized for Link Clicks, one for Landing Page Views, and one for the Quality Visitor event that I created.

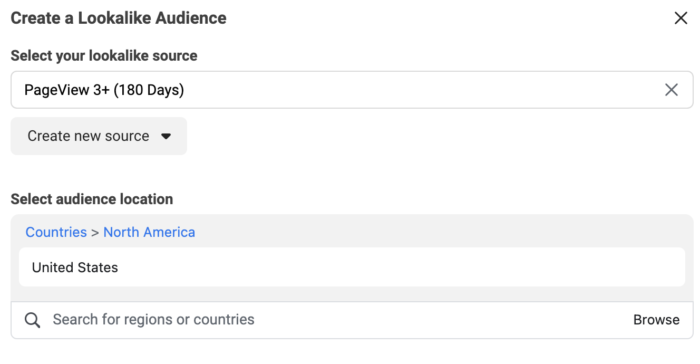
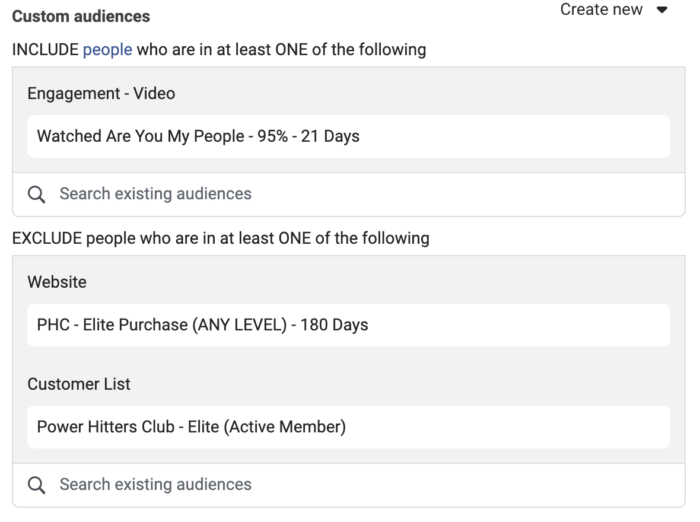
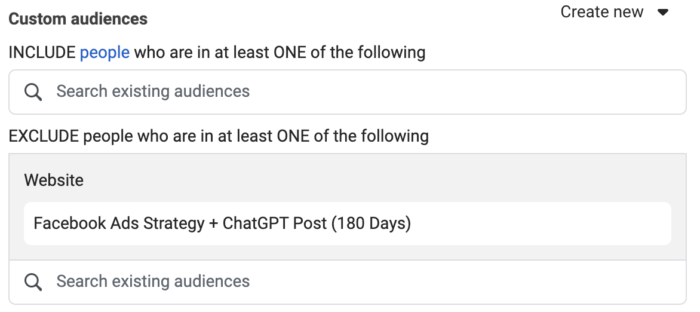
All three ad sets would use the broadest of targeting. I selected the US, UK, Cananda, and Australia, but no custom audiences, lookalike audiences, or detailed targeting were provided. I excluded anyone who already read the blog post that I was promoting.

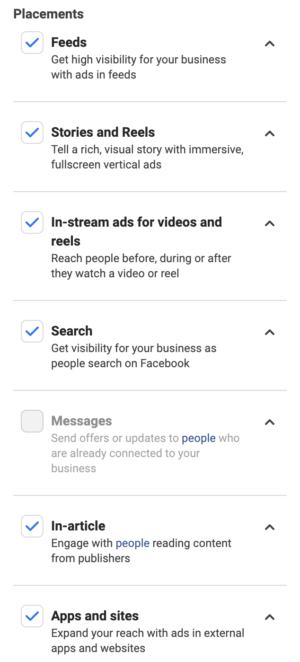
Each ad set would utilize Advantage+ Placements, so all placements were available.

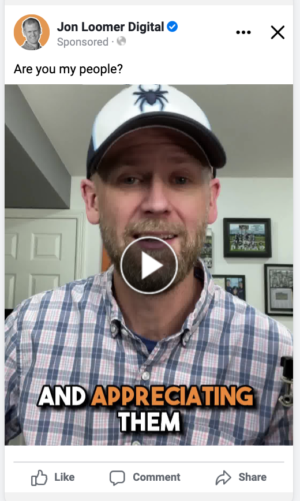
In each case, the ad would promote a popular blog post related to using ChatGPT to create a Facebook ads strategy.

Once the campaign was started, I went into Experiments to set up a new test.

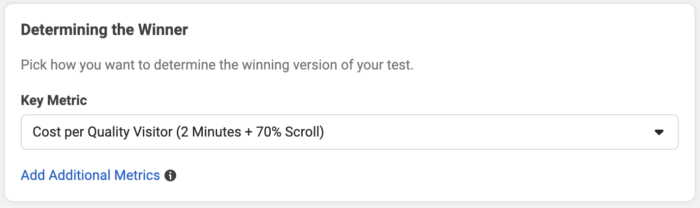
The key metric to determine a winner, of course, would be the Quality Visitor event.

While you might assume that the ad set optimized for Quality Visitors will result in the most Quality Visitors, who knows? It’s always possible it won’t go that direction.

Since I set up the split test this way, the ad sets were able to continue delivering even after the test ended. When the test is ongoing, there isn’t any overlap. A targeted person can only see an ad from one of the three ad sets. When the test is complete, that’s no longer the case.

Theoretically, you can get better results when you’re not constrained by a split test. So, that’s one reason I wanted to keep the ad sets going a little bit longer, even after a winner was found.

I didn’t spend a crazy amount of money on this test, but that also wasn’t necessary. We’re talking about actions that don’t cost a whole lot to get, particularly Link Clicks and Landing Page Views (Quality Visitors will presumably cost more).

I spent about $300 on this test, though I haven’t stopped it yet either. I’m confident that the results I’m going to share won’t change enough to impact what is uncovered.

The Results

Here are the primary metrics that we’ll want to look at:

  • CPM
  • CTR
  • CPC (Cost Per Link Click)
  • Cost Per Landing Page View
  • Cost Per Quality Visitor (2 Minutes + 70% Scroll)

I included CPM because the cost to reach people can do crazy things if it’s drastically different between ad sets. I also included CTR to give you an idea of engagement rate and whether it matters.

First, here are the results during the split test when the target audience was constrained…

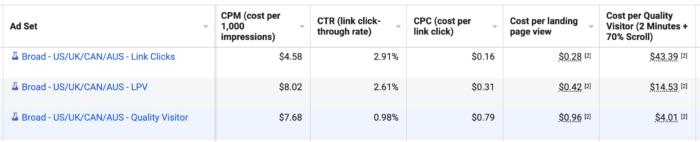
The CTR was about 3X higher when optimizing for Link Clicks or Landing Page Views. The CPC was lowest when optimizing for Link Clicks, twice as much when optimizing for Landing Page Views, and about 5X higher when optimizing for a Quality Visitor. The Cost Per Landing Page View followed a similar pattern.

So, we can get significantly more volume of visitors by optimizing for Link Clicks or Landing Page Views than we can by optimizing for a Quality Visitor. But does optimizing for Quality Visitors lead to more Quality Visitors?

Yep. And it’s not close.

Even though this test resulted in a far higher cost than I usually want to see per Quality Visitor, that cost was about 1/4th of what it was when optimizing for a Landing Page View. And optimizing for Link Clicks, while bringing in volume, resulted in practically no quality visits at all.

That was during the test. Here’s the period of time after the test…

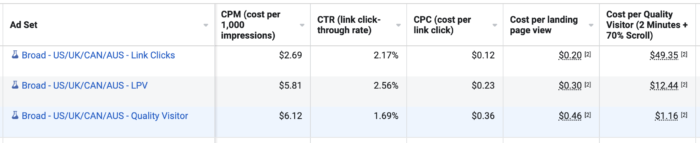
Everything stayed in line. Optimizing for Link Clicks resulted in lots of Link Clicks, but very little quality. Optimizing for Landing Page Views was very similar, but slightly more expensive and with a little bit more quality.

This time, optimizing for Quality Visitors resulted in a Cost Per Quality Visitor that I’m used to — just over $1. I should also point out that this happened while the CPM was the highest when optimizing for a Quality Visitor (more than twice as high as when optimizing for Link Clicks).

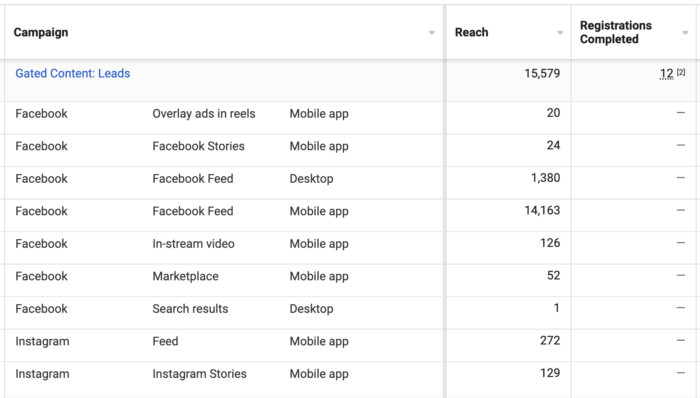
I also shouldn’t ignore an important side effect of driving quality traffic: Other actions. The ad set that optimized for Quality Visitors also resulted in five registrations, while the other two ad sets netted zero.

The Issue with Placements

Remember when I said at the top that optimization for Link Clicks and Landing Page Views can be problematic because it often takes advantage of weaknesses in placements? Wow. We have some evidence of that here.

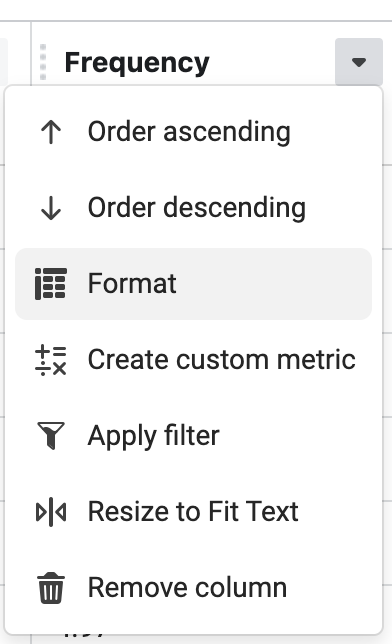
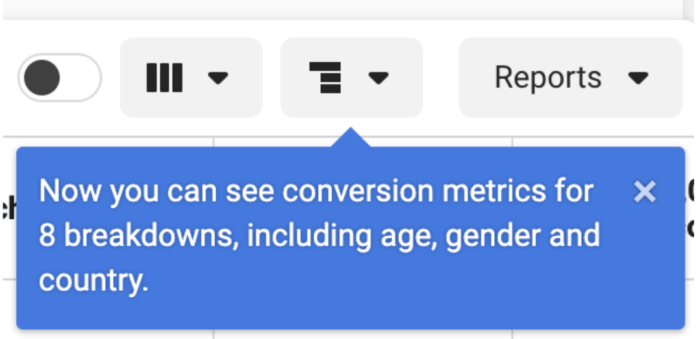
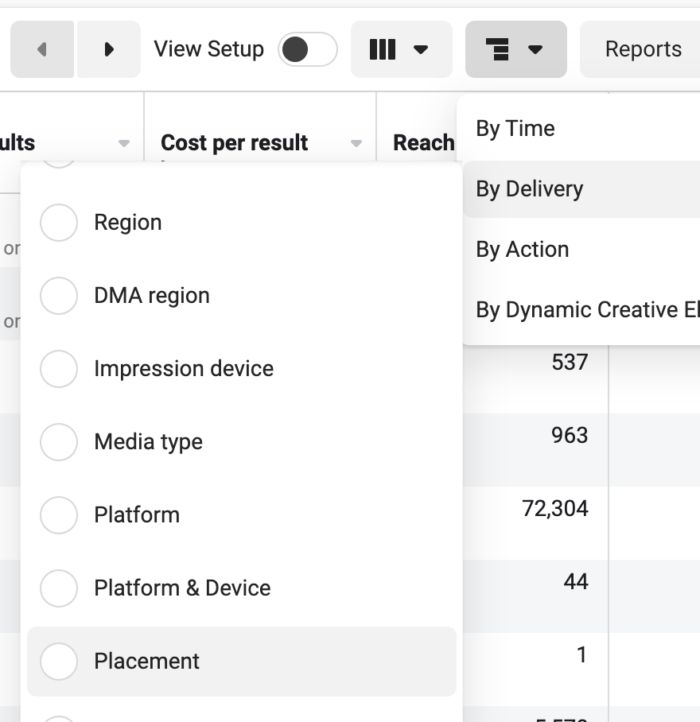
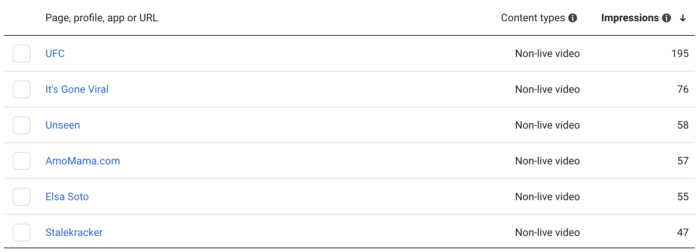
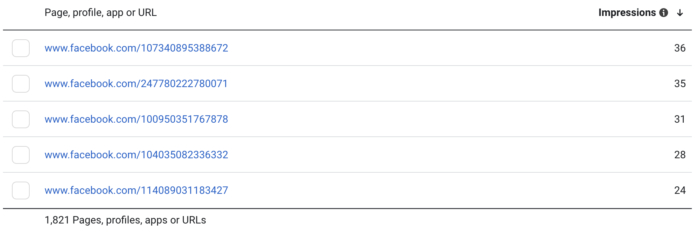
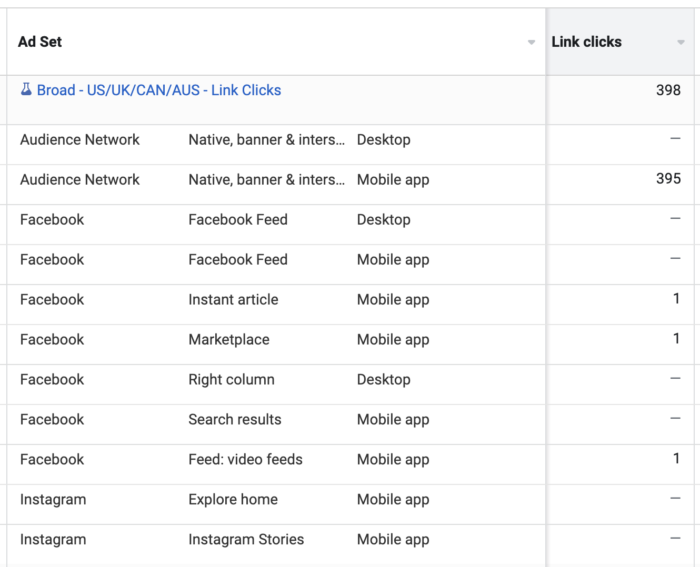
The Audience Network placement is notorious for empty clicks, whether they are due to accidental clicks, bot clicks, or outright click fraud. If we use Breakdowns, we can see distribution by placement. And it’s really something.

When optimizing for Link Clicks, a staggering 99% of those Link Clicks came from Audience Network.

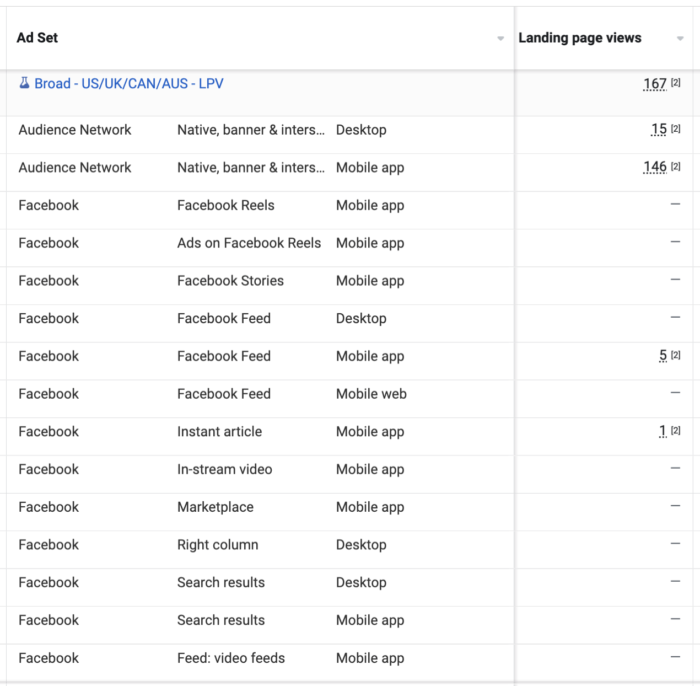
When optimizing for Landing Page Views, 96% of those Landing Page Views came from Audience Network.

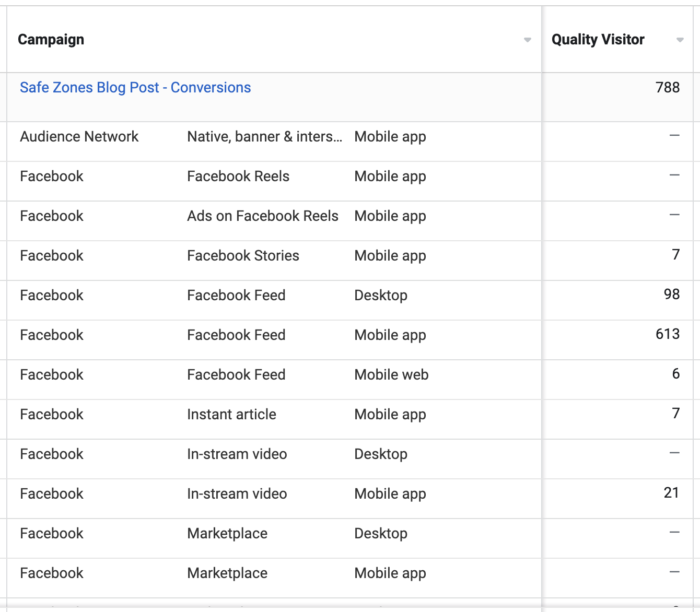
When optimizing for Quality Visitors, 0 of those Quality Visitors came from Audience Network. Instead, 98% came from News Feed (most from mobile).

If this isn’t enough to convince you that Audience Network is problematic when optimizing for traffic actions, only 3 of the 607 people driven to my website from one of these ad sets from Audience Network resulted in a Quality Visitor.

Need the final dagger? When optimizing for Quality Visitors, Facebook knew that Audience Network wouldn’t work. Not a single penny was spent there when the algorithm knew that a Quality Visitor mattered.

The Verdict

This is really good validation. While I’ve optimized for Quality Visitors (and other custom events) for the past three years, I’ve long heard whispers that the algorithm doesn’t actually learn from custom events. I still did it because it couldn’t be worse than optimizing for Link Clicks and Landing Page Views.

When Bram Van der Hallen wrote his blog post about optimizing for custom events for traffic, I told him about my concerns. Well, I’m glad Bram wrote that post because even though I had my doubts, I kept at it and started testing it more.

Yes. This really does work.

If you want to run ads that promote a blog post, you should care about quality website traffic. Do not optimize for Link Clicks or Landing Page Views. Create custom events that fire when actions happen that signify quality traffic activity and optimize for them.

In case you’re wondering, I have a whole lot of custom events on this website that fire. Not only do I have events for scroll and time spent, but I also have events that fire if you click to share, play the podcast player, or watch an embedded YouTube video.

Your Turn

Have you tested out optimizing for quality traffic? What have you seen?

Let me know in the comments below!

The post Split Test: Which Optimization Leads to the Most High-Quality Traffic? appeared first on Jon Loomer Digital.

Last week, I wrote about how to create a custom event that fires when someone views a page of your website for 60 seconds. Now let’s create an event based on scroll depth.

This is all about finding a way to show Facebook what a quality website visitor is. You can use this for reporting, optimization, and targeting.

The 60-second visit is pretty solid, but it has a weakness: What if someone sits at the top of the page for 60 seconds? That is clearly not a quality visit.

That’s why you should also consider scroll depth. Someone who scrolls through much of your post is likely a quality visitor.

Like with the time on page event, I originally wrote about this three years ago but made it way more complicated than it needed to be.

So today, we’re going to make this super easy. From there, you can add complexity if you want.

Your Base Pixel Code

We’re doing this in Google Tag Manager. If you aren’t already using GTM to manage your pixel, you’ll need to first create a tag that fires the base pixel code by itself.

You’ll do this — and create your events — by creating a new tag. Use the Custom HTML tag type and paste your base pixel code.

After naming it, you’ll need to configure the triggering. Use the Page View trigger and have it fire on all pages.

What is Quality Scroll Depth?

Before we create this event, we should discuss what quality scroll depth looks like. The assumption is that you’ll want to use 100% or something close to it. But, that may not be ideal.

A typical blog post may actually have a lot of content that people don’t read after the article itself. You may have comments, a footer, and maybe some other widgets and ads. The amount of scroll may be variable depending on the length of your article and the amount of comments you have.

So, keep this in mind. It’s possible that 70% is too high a barrier that may not be reached even when people read an entire article. While I use 70% in this example, it could just as easily be 50% or something else.

Scroll Depth – 70% Event

Now let’s create this bad boy.

Create a new tag and name it. I’d name it “Facebook – 70% Scroll,” but name it whatever you want.

You’ll use the Custom HTML tag type again, and use the following code:

<script> 
fbq('track','Scroll Depth Event');
</script>

The name you use in the code is what appears in your Events Manager, so keep that in mind.

Don’t forget to turn on Tag Sequencing to have the base pixel code tag fire first. This is within the Advanced Settings under the Custom HTML.

Below that, click to configure your trigger and then click the “+” to create a new one. Select the “Scroll Depth” trigger type.

Check “Vertical Scroll Depths” and enter “70” (or whatever percentage that you want). Note that you could have tracked by pixels instead of a percentage.

The trigger will look like this…

When you’re done, your tag will look lik this…

Use the Preview feature to test it out if you need to. Then publish your new tag and trigger.

Use for Reporting

This will be great for providing more context of your results in Ads Manager. While you might be able to simply add a column for your custom event to your report, there seems to be a bug that doesn’t always make this possible.

If that’s the case for you, create a custom conversion that maps to the custom event.

Now you should be able to add your custom conversion to your report as a new column.

Quick Tip: You may want to rank these events in your top eight for Aggregated Event Measurement if you have room. This will assure that the results are more complete.

Use for Optimization

I’ve long complained that Facebook doesn’t provide a built-in way to optimize for quality traffic. Instead, you optimize for landing page views or link clicks, and that almost always results in low-quality clicks.

But, there’s an alternative. While the jury’s out on whether Facebook actually learns from custom event activity, it’s certainly better than low-quality clicks.

Create an Engagement campaign.

Select “Website” as your conversion location within the ad set.

Finally, select “Maximum number of conversions” as your Performance Goal and then your pixel and conversion event.

Scroll Depth will now be the focus of your “Results” column.

Use for Targeting

You can also target the people who scrolled on your website. Create a website custom audience that is based on your events.

If you want, you can actually refine by the exact page that was scrolled.

Watch Video

I recorded a quick video on this, too. Check it out…

View this post on Instagram

A post shared by Jon Loomer (@jonloomer)

Your Turn

Have you ever used a custom event like this one? What do you think?

Let me know in the comments below!

The post Create a Meta Pixel Event that Fires After Scrolling 70% Down a Page appeared first on Jon Loomer Digital.

Did you miss our previous article…
https://www.sydneysocialmediaservices.com/?p=5128

Facebook Ads Manager is changing all the time. There were three recent changes that may not have been big enough to create a lot of noise individually, but you need to be aware of them.

In this post, we’ll discuss the following:

  1. The return of conditional formatting
  2. The return of conversion breakdowns
  3. The loss of Instant Articles placement

Let’s go…

Conditional Formatting is Back

It was just a week ago. It feels like yesterday. I wrote a blog post lamenting the disappearance of conditional formatting.

Well, it’s back.

I don’t know what happened. But conditional formatting has returned to your custom ad reports. And this is good news because it’s a valuable tool.

You can access it in one of two locations (reminder: This is in the custom ad reports, not the main Ads Manager):

1. The header row drop-down menu.

Facebook Ads Conditional Formatting

2. The “Format” button.

Facebook Ads Conditional Formatting

I prefer the header row menu since it’s one less step to format the metric that I want.

You can format cells based on a single color or a color scale.

Facebook Ads Conditional Formatting

I prefer the color scale, so let me show you a quick example.

Facebook Ads Conditional Formatting

With a green/white/red scale, I can automatically assign colors to cells depending on whether results fall within the bottom, middle, or top of the scale (signifying good, average, and bad).

Here’s an example of what that might look like…

Facebook Ads Conditional Formatting

It’s a great tool to quickly get a visual on how your ads are performing. Read this blog post for more details on conditional formatting.

Conversion Breakdowns Return

Back in November, Facebook announced that breakdowns of conversion reporting would return after a long, post-iOS 14 hiatus.

I didn’t have this right away. Admittedly, I mostly forgot about it. Eventually, I’d see it in my custom ad reports, but I still wouldn’t have it in my main Ads Manager.

And then today, I finally saw it…

Conversion Breakdowns Facebook Ads

So, a quick recap of what happened is in order. When Facebook made a bunch of changes in response to iOS 14 opt-outs, one piece of functionality that was lost was the ability to breakdown conversions.

For example, go to the Breakdown drop-down menu and choose to breakdown by Placement.

Facebook Ads Breakdown

Previously (and post iOS 14 changes), you would get a total for conversions but you wouldn’t see how that metric broke down by placement.

Facebook Ads Breakdowns

You would get these breakdowns for other metrics, but not for any type of conversion (standard events, custom events, or custom conversions).

Now, of course, that is back.

Facebook Ads Breakdown

This is super useful. Until now, we didn’t truly know how segments like age, gender, country, and placement performed. We could get breakdowns of surface-level metrics, but not conversions.

If you don’t have this yet, it appears to be rolling out now.

Instant Articles Placement Going Away

Finally, you may have noticed this update if you’ve manually selected placements recently.

Facebook Instant Articles

We already knew as of October of last year that Meta planned to retire the Instant Articles format in April. This is a good reminder.

If you have ads running to the Instant Articles placement, you shouldn’t see an interruption of delivery. Your ads will keep running, but they’ll no longer run to that non-existent placement.

I’ve seen that less than 1% of my budget is spent on this placement, so it’s hardly a big loss. Still, advertisers prefer to see the addition of placements rather than subtraction. This means less ad inventory, which can lead to higher costs (even if it isn’t noticeable).

Your Turn

Have you noticed any other big changes?

Let me know in the comments below!

The post 3 Recent Facebook Ads Manager Updates appeared first on Jon Loomer Digital.

Did you miss our previous article…
https://www.sydneysocialmediaservices.com/?p=4932

Relevance is an important factor for the success of your Facebook ads. One way to target a relevant audience is by isolating those who viewed the most pages of your website.

Assuming you have the pixel on every page of your website, you can do this. Let’s talk about it…

How it Works

When you create a website custom audience, click the Events drop-down menu and select PageView under “From Your Events.”

website custom audience pageview

Then click the “Refine by” menu and select “Aggregated Value.”

website custom audience pageview

By default, your refinement will be “Frequency” and utilize the logic of “is greater than or equal to” 2.

website custom audience pageview

In other words, your audience will only include those who fired the PageView event at least two times. You can change the logic if you want…

And you can also change the number. I’ve messed around with this in the past to see how relevant I can get with my audience.

Feel free to experiment!

Audience Size Considerations

Let’s assume that you get 10,000 page views per month. If you apply a refinement to limit your audience to those who viewed at least two pages, that audience is going to shrink. And if you refine to three, four, or more, it’s going to keep on shrinking.

That’s not necessarily a bad thing. Just understand how that works. Your pool is going to shrink as you make the audience more relevant.

One lever you have to counter this is the retention. By default, the audience will be of those who visited your website during the past 30 days.

Facebook Website Custom Audience Retention

If you go shorter than 30 days, your audience is going to shrink further. But you could go all the way to 180 days to capture the most visitors who viewed multiple pages of your website during that time.

Optimization Considerations

The starting point for optimization should always be focused on your goal. Don’t overcomplicate things. If you’re trying for conversions, optimize for conversions.

It’s very likely you won’t have the volume to exit the learning phase. That doesn’t necessarily mean that you shouldn’t optimize for that action. Try it out and see if you can get good results.

If the audience is just too small, you can consider using Reach optimization to reach as many people within that small audience as possible.

Reach Optimization

Lookalike Audiences

When you limit a website custom audience like this, the audience is going to shrink. If you lack volume of traffic, targeting like this might not be viable.

But that doesn’t mean that you shouldn’t create these audiences. You can also use it as a source audience for Lookalike Audiences so that you can target people similar to those who view multiple pages of your website.

Lookalike Audience

Watch Video

I created a short video about this, too. Watch it below…

@jonloomer Target the people who view the most pages of your website with Facebook ads. #facebookads #facebookadstips ♬ Old School Boom Bap Hip-hop – Friends_House

Your Turn

Do you create custom audiences like this based on frequency? How do you use them?

Let me know in the comments below!

The post Maximize Relevance in Your Facebook Ads: Target Website Visitors Who Viewed Multiple Pages appeared first on Jon Loomer Digital.

Did you miss our previous article…
https://www.sydneysocialmediaservices.com/?p=4253

While broad targeting with Facebook ads may be the latest trend, there’s still a place for powerful funnels using micro-targeting. There are many ways that you can do this, but let’s focus on a video funnel.

The weakness of video view custom audiences is that the presence of a person in one audience can say only so much about their level of engagement. At most, you know that someone watched a video to completion. But, how valuable is that?

Facebook doesn’t allow for the creation of video view custom audiences that allow you to isolate the people who are most engaged with multiple videos over time. It would be great if an element of frequency were added, of course!

That said, the creation of a funnel is the next best thing. Those who survive the funnel are those who continuously watch your videos, rather than watch only one.

Your funnel can be as long as you want it to be, utilizing multiple steps and videos. In this post, I’ll give you an example of a simple funnel with three primary steps and two ads.

1. Publish Videos Regularly

While you could technically build a funnel entirely with ads, I contend that makes things more difficult than they need to be. At that point, the top of your funnel depends entirely on your ad spend.

I recommend that you start with organic distribution. I publish one or two Reels to Instagram and Facebook every day. This feeds the top of the funnel.

Instagram Profile Videos

I also recently started promoting a few of these Reels. It doesn’t matter whether the engagement with the videos is paid or organic, so this helps assure the top of the funnel is large enough so that we have people to target at the bottom.

2. Isolate Those Who Watched 95% of a Recent Video

Let’s create a video view custom audience of those who watched at least 95% of a recent video. Within your Audiences, create a new custom audience and select Video as the Meta source.

Video View Custom Audience

Select “People who have watched at least 95% of your video” from the Engagement drop-down.

Video View Custom Audience

Click to “Choose Videos.” You can select videos from both your Facebook Page and Instagram Business Profile.

Video View Custom Audience

Select videos. You should start with at least those videos that you published during the past seven days.

Next, set a retention. This is how long someone will remain in your audience after watching your video. A retention of 7 days means that your audience will include anyone who has watched one of the videos you selected during the past seven days. This will update dynamically.

Video View Custom Audience

The retention is up to you. I use seven because recency adds relevance. If you use 365 or 180 and select videos going back a year, the relevance could be very low for those who watched one video a long time ago.

Keep in mind that you will need to update this audience every time you publish a new video if your focus is on recent views.

Video View Custom Audience

In my example above, my audience includes 166 videos. Keep in mind that this kind of ticks off the system because it takes a while to load. But it shouldn’t impact the effectiveness of your audience. You can remove older videos over time if you feel you need to.

3. Target This Group with Your First Ad

Now we want to reach this special group with our first ad — the second step in the funnel.

I wrote a separate blog post about how to target people who are most engaged with your Reels if you want to read that, too.

I use the Awareness objective and optimize for Reach, but use whatever you’re comfortable with.

Reach Optimization

The reason I use Reach is that I don’t want to optimize for an action when targeting a small and relevant audience. When you limit this audience to people who watched 95% of a video during the past 7 days, it’s bound to be an audience of around or under 1,000 people (unless you have a big organic audience or put decent budget behind it).

I leave the frequency cap at 1 impression in 7 days.

Reach Optimization

The reason for that here is that I don’t need to hit you a lot with this ad. In theory, if you engage with my videos often, you’ll continue to see my ad (until you watch this video in full). If you only watch one video, you’ll only see my ad once.

I target the custom audience that we created in Step 2. I also exclude those who watched the video in this ad. You’ll need to create that audience after you publish this ad and then update the ad set.

Targeting Reels Engagement

The following factors assure you won’t keep hammering people with your ads forever:

  1. 7-day retention for the audience in Step 2
  2. Frequency cap in this ad set
  3. Exclusion once someone watches the video in this ad in full

You could technically keep this funnel going, add new videos to the audience at the top of the funnel, and reach mostly new people. The only people who will continue to see your ads are those who are continuously watching your videos in full but won’t watch your video in this ad.

What you promote in your video is up to you. I chose to do something really light, but different than my other videos so that it stands out.

Are You My People

4. Isolate Those Who Watched 95% of THAT Video

Okay, so we already talked about isolating this group, but there are actually two separate audiences you should create. The first is for exclusion purposes in Step 3. I used 365 days as my example, but you could talk me into using something smaller like 60 or 90 days.

Are You My People

By using 365 days, someone would only need to watch my video in full once and they’ll never see my ad again. Changing the retention could mean if someone keeps watching my video, they might see my ad again 60 days later. And maybe that would be okay.

You could use either ThruPlay or up to 95% here. I’ve experimented with both. But if it’s a shorter video (mine is 20 seconds), it doesn’t make much difference.

You’ll also need an audience of people to target. I recommend using a shorter retention so that these people don’t keep seeing your ads for a long period of time. I use a 21-day retention.

Are You My People

5. Target This Group to Promote a Product

Now it’s time to target those from Step 4 to promote a product.

We’ll want to target the second audience we created in Step 4. In other words, once you watch my “Are You My People?” ad to completion, you might see my ad promoting my products for up to 21 days. I’m targeting this group and excluding those who are already signed up for my Power Hitters Club – Elite membership (one of the things I’m promoting).

This ad (we’ll get to it in a second) does not utilize a video. But even if it did, I wouldn’t exclude those who already watched it because I’d want the target audience to keep seeing my ad for up to 21 days (limited by frequency cap) until they sign up for my membership.

Once again, I use Reach optimization. In this case, I set the frequency cap at 1 impression every 3 days. We’re getting a little more aggressive here.

Are You My People

The ad promotes both my PHC – Elite membership and one-on-ones.

Experiment!

You could have extended this another step or two if you wanted. The thought here is that you could conceivably watch one video by mistake, especially a short video. But by adding more steps, you require people to watch more videos and thereby increasing the likelihood that they are highly engaged and willing to buy something.

Of course the more steps you add, the more this funnel is going to cost. That may be doable for more expensive products. At that point, it may make sense to invest more in a deeper funnel to target the most relevant audience at the end.

There’s no right or wrong way to do this. Think it through and try things out!

The Results?

What kind of results you get out of such a process will depend from situation to situation. This isn’t a magic formula that will make you rich. This is simply an example of a mechanism that can help you isolate some of your most engaged people.

It’s also an inexpensive way to experiment. Use it as a starting point. You can apply a similar approach to website remarketing, email nurture sequences, and more.

Watch Video

Of course, I created a short-form video about this.

@jonloomer Here’s how to create a powerful video funnel with Facebook ads. #facebookadstips ♬ Hip-Hop Instrumental – Tonkyel

You can follow me on TikTok if you haven’t already. These videos are also shared to Reels via Instagram and Facebook.

Your Turn

Feel free to use this video funnel template and make adjustments to fit your needs. Try it out and let me know how it works for you!

The post How to Create a Video Funnel with Facebook Ads appeared first on Jon Loomer Digital.

Did you miss our previous article…
https://www.sydneysocialmediaservices.com/?p=4191

Meta offers the ability to control where your ads appear. Do a little digging to uncover which websites, Facebook pages, apps, and videos are showing your ads. If necessary, you can restrict the category of content or which properties can show them.

First, let me explain. There are several placements your ads might appear on. This includes feeds, stories, Reels, apps, websites, and more.

If your ad appears within the Audience Network placement, where did it appear specifically? Which apps and which websites? If your video was found within another video or Reel, which one?

Once you uncover this information, you can take additional action. Let me show you…

Brand Safety

Within your Ads Manager Tools menu, go to Brand Safety.

Brand Safety offers Controls, Block Lists, Publisher Lists, and Delivery Reports.

Meta Brand Safety

Controls

Within Controls, you’ll get access to Inventory Filter, Block Lists, Topic Exclusions, and Content Type Exclusions.

Meta Brand Safety

There are separate inventory filters for Audience Network and the remaining placements. You have the option of Full Inventory, Standard Inventory (Default), and Limited Inventory.

Meta Brand Safety

“Full” means that your ads can be shown anywhere without restriction. “Limited” means that your ads will be shown on the safest properties. These categories are defined based on discussion of things like tragedy or conflict, debated social issues, objectionable activity, sexual or suggestive, strong language, and explicit content.

Here’s an example for Tragedy or Conflict.

Meta Brand Safety

You can also apply topic exclusions to prevent your Facebook in-stream video ads from appearing in on-demand videos (not live) about specific topics (Gaming, News, Politics, Religion and Spirituality).

Meta Brand Safety

Finally, you can apply a content type exclusion to prevent your ads from appearing on live videos or non-partner publishers.

Meta Brand Safety

Publisher Lists

Publisher Lists shows where your ads can appear, separated by placement.

Here’s an example for Audience Network.

Meta Brand Safety

And here’s Instagram Profile Feed.

Meta Brand Safety

This doesn’t mean that your ads do or will appear within these properties. It just means that they can.

Delivery Reports

This is how you view where your ads actually appeared.

First, select the placement that you want to focus on.

Facebook Delivery Reports

You can choose a specific campaign or time period.

Facebook Delivery Reports

Here’s an example for In-Stream Video placement. You’ll get a list of the pages, content types (live video or non-live video), and impressions.

Facebook Delivery Reports

You may instead see page URLs.

Facebook Delivery Reports

When viewing Audience Network, you’ll get a list of properties that will include websites and apps.

Facebook Delivery Reports

What to Do With This?

You don’t necessarily need to do anything with this. But you may be very careful about which brands and subject matter you are aligned with.

First, you can download the Delivery Report. Click at the far right to download your report.

Facebook Delivery Reports

You can also choose to prevent your ads from appearing on specific properties by blocking them. To do this, hover over the property that you don’t like to add it to your Block List.

Facebook Delivery Reports

To view your Block List, click on the left menu.

Facebook Delivery Reports

Should You Use This?

This is one of those things that I’m not all that worried about. To reach my ideal audience, I’m not concerned about where they are at the time when they see my ad.

At the same time, you may care about this. I imagine this may especially be the case if you are in a sensitive category and do not want your ad to appear on conflicting senstitve content.

If that is the case, your best course of action may be to use the “Limited” inventory filter and topic exclusions. Otherwise, you’re playing whack-a-mole by blocking the properties that you see pop up in the publisher lists and delivery reports. These lists will change on a daily basis.

Your Turn

Do you use these controls?

Let me know in the comments below!

The post Control Which Websites, Pages, Apps, and Videos Your Facebook Ads Appear On appeared first on Jon Loomer Digital.

Did you miss our previous article…
https://www.sydneysocialmediaservices.com/?p=4146

You can pin important campaigns, ad sets, and ads in Facebook Ads Manager. Sometimes the simplest tools are the most helpful.

Here’s how it works…

Pinning in Ads Manager

It doesn’t matter whether you’re viewing campaigns, ad sets, or ads within Ads Manager. But my example will be using campaigns.

Hover over the name of the campaign. Then you’ll get options for View Charts, Edit, Duplicate, and Pin.

Pin Campaigns in Facebook Ads Manager

Once you pin a campaign, it will move to the top. It will also display a blue pin icon, regardless of whether you are hovering over the name.

Pin Campaigns in Facebook Ads Manager

You can pin multiple campaigns. As far as I can tell, there’s no limit to the number of campaigns you can pin.

Pin Campaigns in Facebook Ads Manager

If you want to unpin a campaign, simply hover over the name of a pinned campaign and click “Unpin.”

Pin Campaigns in Facebook Ads Manager

Why Would You Use This?

This is a really good organizational tool.

Let’s assume that you’re running a whole bunch of campaigns, ad sets, or ads. This may apply most to ads since you’re more likely to have a lot of ads running than campaigns.

Undoubtedly, there are specific assets you care about most and that you want to watch most closely. Pin them. No more scrolling or filtering. Always at the top.

Speaking of filtering, the pins hold when you filter, too. So, if you filter by objective, for example, the campaigns that you pinned of that objective will appear at the top.

Handy!

Is This New?

It’s new to me. Whether it’s been there and I’ve overlooked it or it just showed up in my Ads Manager, I can’t tell you for sure. What I do know is that everyone I’ve shown it to within my community so far hasn’t seen it before.

Of course, someone commented on a video I created that they’ve had this for a year. Is that true? Maybe. It’s also possible it’s something that was originally tested and then slowly rolled out.

It really doesn’t matter, though. It’s a good feature, and you should know about it!

Watch Video

And here’s a video I created about this feature…

@jonloomer You can now pin campaigns, ad sets, or ads to the top of Facebook Ads Manager. Here’s how it works. #facebookads #facebookadstips ♬ Voodoo (Hip Hop Instrumental) – SickBeats

If you haven’t followed me yet on TikTok, do that now!

Your Turn

Have you been pinning campaigns? Will you? What do you think?

Let me know in the comments below!

The post Pin Campaigns in Facebook Ads Manager appeared first on Jon Loomer Digital.

Did you miss our previous article…
https://www.sydneysocialmediaservices.com/?p=4058

Historically, the average CPM (Cost Per 1,000 Impressions) has increased for Facebook advertisers during the holidays as competition for eyeballs and ad spending increase. Did it happen this year?

Prior to 2020, advertisers routinely saw CPM costs double, triple, or more during the most competitive times. I wrote a blog post about this phenomenon way back in 2014. Here’s a graphic showing that increase from 2013.

Holiday Facebook Ad CPM SocialCode

Of course, things got a bit weird and difficult to predict since 2020. Let’s take a look at what has happened so far this holiday season.

Year-Over-Year Comparison

I use the Within Marketing Pulse to track Facebook CPM and other information. It’s a free resource. Within provides reporting on what they’re seeing from their clients with $500 Million in budget.

Here’s what they’re showing compared to 2021 for Facebook and Instagram CPMs.

Facebook Instagram Holiday CPM

Facebook CPM has remained well below where it was on the same day a year ago. It’s remained between 30 to 60-percent below last year’s CPM throughout the past three months. Instagram CPMs have held closer to last year’s costs but are still down most days.

Absolute CPM

Well, maybe last year saw higher CPMs this time of year than normal. We should also check to see if CPM costs are generally trending up during the holidays.

Here’s a chart of the average CPM on Facebook during the past three months.

Facebook Ads CPM

The average CPM for Within clients held consistently between $8.73 (November 25) and $15.32 (November 29). Prior to November, it was generally around $12.50. CPMs certainly became most volatile during November, but that resulted in just as many extreme lows as highs.

Overall, Facebook CPM is moving generally along that $12.50 line. It’s difficult to make the claim that we’ve seen a clear holiday spike since the lowest CPM during the past three months reported by Within happened on Black Friday (November 25).

Why Aren’t CPMs Going Up?

First, it’s important to point out that Within Marketing Pulse doesn’t represent all advertisers on the platform. There could be biases and small sample issues here.

We don’t know precisely what Facebook is seeing globally. We do have Meta’s Q3 Earnings Report. Meta reported a steady drop in average cost per ad.

Facebook Average Price Per Ad

Meta also reports a flattening in ad revenue, which is unusual historically for the platform.

Meta Ad Revenue

A drop in ad costs (loosely CPM) could be at least partially related to a drop or flattening in ad revenue. Are advertisers spending less this holiday season? Are there fewer advertisers?

I’m also not an economist. Another potential factor related to CPM would be inventory. Inventory could be related to the number of users and the amount of time they are on the platform. It can also be altered by adding or removing placements. An increase in inventory would make it more difficult for CPM costs to increase (I presume, though it’s not my expertise).

We’re missing the fourth quarter, of course, but it will be interesting to see that data when it comes up. That will give us a much better idea regarding what has happened with advertising during the holidays in 2022.

What This Means

These are signals that CPM costs aren’t taking a normal holiday spike. As a result, this may be the best time to advertise. Not only are costs steady, but your customers are primed to buy during the holidays.

There are always variations in industries and brands, but there is a potential opportunity here.

Your Turn

I haven’t seen a dramatic increase in CPM related to my advertising, though that’s the definition of small sample sizes. What are you seeing?

Let me know in the comments below!

The post Did Facebook Ads CPM Go Up This Holiday Season? appeared first on Jon Loomer Digital.

Did you miss our previous article…
https://www.sydneysocialmediaservices.com/?p=4014

Meta has started rolling out a big update to lead forms for Facebook ads. Advertisers will have the ability to tell a story by displaying benefits, product imagery, testimonials, and more.

This is the most significant update to Facebook lead ads in years. Let’s go through what is new (see “Final Product”).

I include a video near the bottom that walks through what this looks like when you’re done.

Form Type

When you create a lead form, you will know that you have this update if you have the “Custom” form type.

Facebook Lead Form

If you don’t see it, you don’t have it. Get in line, I guess.

Intro

Once you select the Custom form type, the big changes will be found within the Intro section.

You’ll first need to provide a 1200×1750 image and a headline (no more than 38 characters).

Facebook Lead Form Intro

Once you upload the image, the form will automatically extract a color scheme. You can’t manually change that scheme, so it will depend on the colors found in the image.

Facebook Lead Form Intro

Truthfully, this could be the only way that you use this update and you’d see improvements. The color scheme, for example, will apply to buttons, text, and the form generally throughout.

Next, provide the overview and benefits related to this form…

Facebook Lead Form Intro

Build Your Story

You have the option of adding up to four other sections.

Facebook Lead Form Build Your Story

Keep in mind that you will need to turn on at least one of these. That’s somewhat unfortunate since you may not have a need for these sections and may just want to turn on the color scheme.

But, you should be able to find a creative way to use one of these. If you had to choose one, the Incentive section is a good place to start.

How it Works

This is the first section you can optionally turn on.

Facebook Lead Form How it Works

Know that for each of these sections, you will have options for the header. Instead of “How It Works,” for example…

Facebook Lead Form How it Works

The purpose of this section could be drastically different depending on the header you select. But, you can add multiple steps of text that all include a title and description.

Products

Next, you can highlight your products…

Facebook Lead Form Products

Or it could be your services, courses, and other things…

Facebook Lead Form Products

Regardless, you can provide a 1200×803 image, title, description, and up to three benefits for each item, and it’ll be displayed as a carousel.

Social Proof

This section highlights what people are saying about your business.

Other options for the section header…

Facebook Lead Form Social Proof

Visually, this is a lot like the Products section. You’ll have an image carousel showcasing what each source is saying.

Incentives

Finally, what should motivate someone to complete this form?

Facebook Lead Form Incentives

Provide whatever incentives you can here. This is all textual, and there aren’t any options for the header.

Final Product

Here is what this section of the form looks like when you’re all done…


Who is This For?

These updates are ideally for a situation where a lead is someone expressing interest in a product. For example, complete this form if you’re interested in buying a car, house, or signing up for a bathroom remodel. The updates allow you to showcase more about your company and products to incentivize the lead.

This may not be ideal for a generic lead that is in exchange for some freebie like an ebook or webinar registration. You could still find ways to make that work, of course.

Watch Video

I also recorded a video about these updates. You can watch it here…

@jonloomer Big updates for Facebook lead ads forms. #facebookads ♬ Old School Hip-Hop – TineSide

If you haven’t yet followed me on TikTok, do it now!

Your Turn

What do you think of these updates? Will you use them?

Let me know in the comments below!

The post Big Update to Facebook Ads Lead Forms appeared first on Jon Loomer Digital.

Did you miss our previous article…
https://www.sydneysocialmediaservices.com/?p=3938