Oh my goodness. Finally. After about a year-and-a-half on hiatus, the “Compare Attribution” feature has returned to Facebook Ads Manager.
Let’s provide a little bit of history on the feature, why you should care, and how to use it…
Understanding Attribution
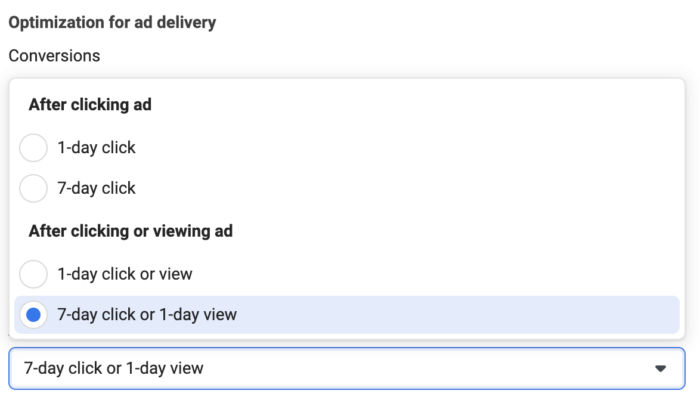
“Attribution” is how Facebook gives credit to an ad for conversions. By default, an ad gets credit for a conversion if a targeted user clicks your ad and converts within 7 days or views your ad without clicking and converts within a day.
You determine how attribution is defined when you create your ad set. Options exist to change attribution to 7-day click, 1-day click and 1-day view, or 1-day click.
This setting impacts two things:
- How Facebook optimizes ad distribution
- How Facebook reports conversions
In other words, if you choose 1-day click, Facebook will focus (in theory) on people most likely to convert within a day after clicking. The reporting in Ads Manager will also be based on this attribution setting. This created confusion because you would only see 7-day click attribution if you determined this in the ad set.
Of course, it hasn’t always been this way. This was one of many changes post-iOS 14.
The Former “Compare Attribution Windows”
So, prior to iOS 14 changes, it didn’t matter what conversion window you optimized for within the ad set. Reporting would be the same in Ads Manager. By default, that was 28-day click and 1-day view back in the day.
Not only that, you could “Compare Attribution Windows” to view how many conversions happened within each window.
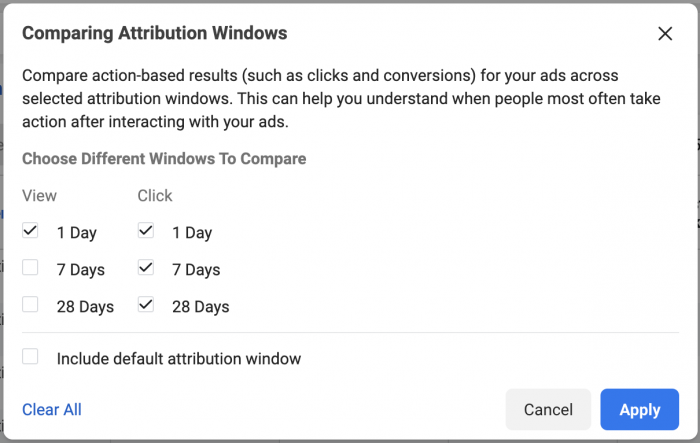
This was very valuable for so many reasons. First, it helped detrmine how to optimize. Second, it could help you get a clearer picture of the click-and-view-through breakdown (you may consider the numbers inflated if most are 1-day view).
The iOS 14 Changes
And then iOS 14 happened.
One of the biggest adjustments was the removal of 28-day click attribution. Advertisers went from having to defend “inflated” reporting to now needing to find “lost” conversions.
But, the other big change was losing the ability to compare attribution windows. This loss was one more item on the list which caused a decrease in confidence related to reporting.
What’s funny is that Facebook would eventually sneak in a “Standardize Attribution Setting” feature, buried in the custom ad reports.
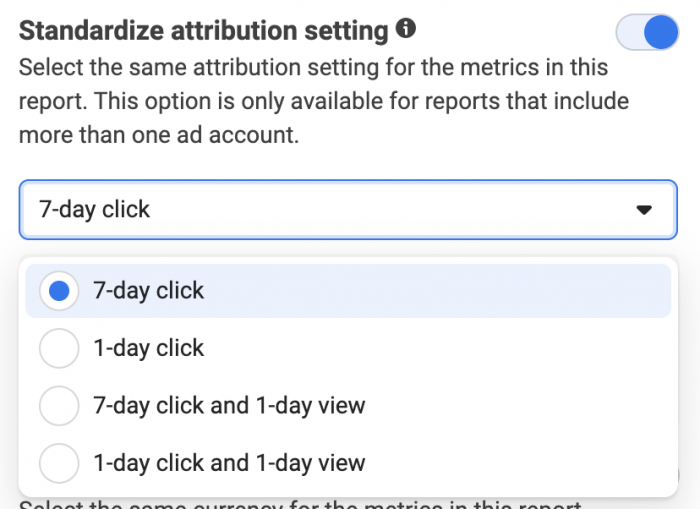
Most advertisers didn’t know that it existed, and it was a weird work-around since you were required to select multiple ad accounts in order to access it.
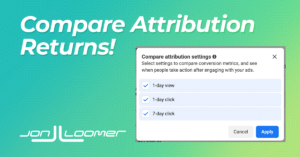
Compare Attribution Settings Returns
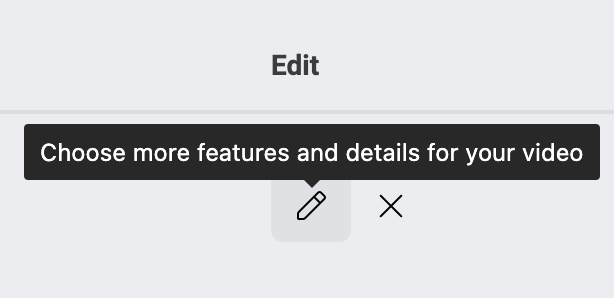
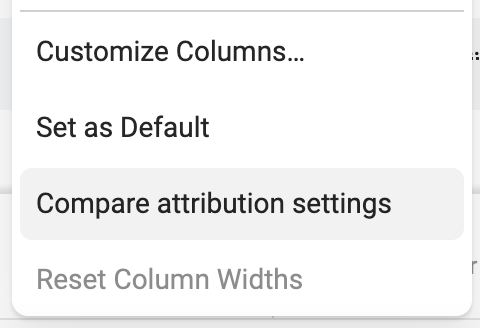
And today, I was happy to see this little message within Ads Manager by the Columns menu…
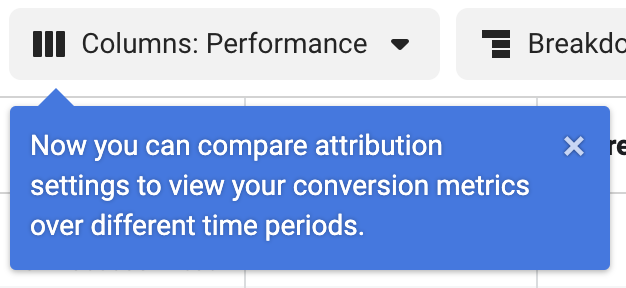
Like the old feature, it’s found at the bottom of the Columns menu.
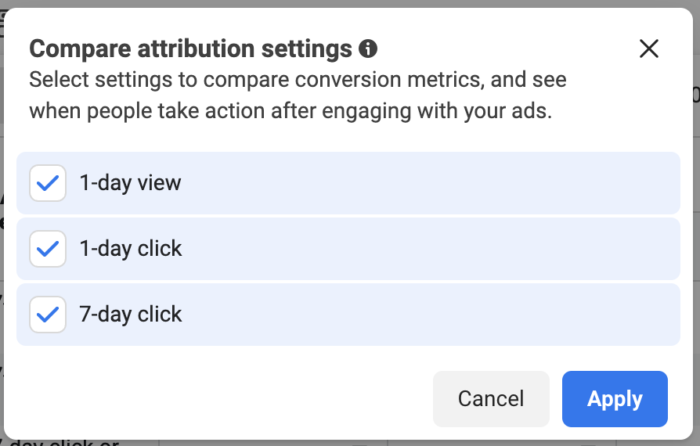
Click that, and you can select the attribution settings that you want to view as a column in your report.
How to Use This
This is a really big deal. The main reason: Context.
Imagine, if you will, a situation where you are remarketing to your website visitors and email list. Facebook reports some really big conversion numbers. You’re curious how many of these conversions resulted from a 1-day view. Such conversions can happen a lot with remarketing — some of the people you targeted were already visiting your website.
Now, you can get clarity on that question.
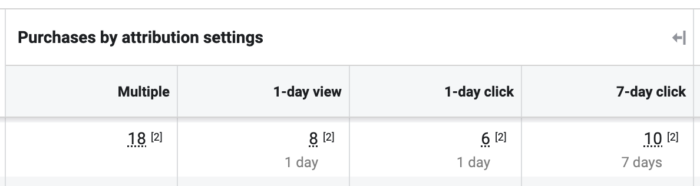
In this example, 8 of the 18 reported purchases were 1-day view. That doesn’t mean those 8 don’t count, but you may value them less than click-through conversions.
The other big reason to use this is for deciding how to optimize. It’s a running debate whether you should optimize for 1-day click in some situations or not because, technically, you’d “lose” all of the 7-day click conversions. But, maybe you’d get more 1-day click conversions as a result (or the argument goes).
When you have this data available, there is no longer a risk to using 1-day click attribution. You don’t lose the 7-day click conversions because you can still see them with this feature. And it’s possible that this will tell you that there isn’t a benefit to using a certain attribution setting.
Old Data Unavailable
I haven’t seen an official announcement from Facebook on this, but it looks like I onlly have this data for newer campaigns. I’m not sure how far it goes back, but I certainly don’t currently have these breakdowns for any of the 28-day click ad sets, prior to the big changes of iOS 14.
Why Not Create a Default View?
Honestly, I don’t understand why a full reporting of conversions based on all attribution settings isn’t available. You used the 1-day click attribution setting in the ad set. So what? Show how many conversions happened within each setting. Don’t force the advertiser to dig for it.
By making it default, this helps Facebook. Advertisers aren’t misled by under-reporting. They may have a more positive impression of their ad performance as a result. The context this ads can also lead to smarter decisions.
Your Turn
Needless to say, I’m pretty pumped about this. While I used the Standardize Attribution workaround, it’s nice to have a piece of pre-iOS 14 back.
What do you think? Let me know in the comments below!
The post Compare Attribution Settings Returns to Facebook Ads Manager appeared first on Jon Loomer Digital.
Did you miss our previous article…
https://www.sydneysocialmediaservices.com/?p=3116