Posts

Last week, I wrote about how to create a custom event that fires when someone views a page of your website for 60 seconds. Now let’s create an event based on scroll depth.

This is all about finding a way to show Facebook what a quality website visitor is. You can use this for reporting, optimization, and targeting.

The 60-second visit is pretty solid, but it has a weakness: What if someone sits at the top of the page for 60 seconds? That is clearly not a quality visit.

That’s why you should also consider scroll depth. Someone who scrolls through much of your post is likely a quality visitor.

Like with the time on page event, I originally wrote about this three years ago but made it way more complicated than it needed to be.

So today, we’re going to make this super easy. From there, you can add complexity if you want.

Your Base Pixel Code

We’re doing this in Google Tag Manager. If you aren’t already using GTM to manage your pixel, you’ll need to first create a tag that fires the base pixel code by itself.

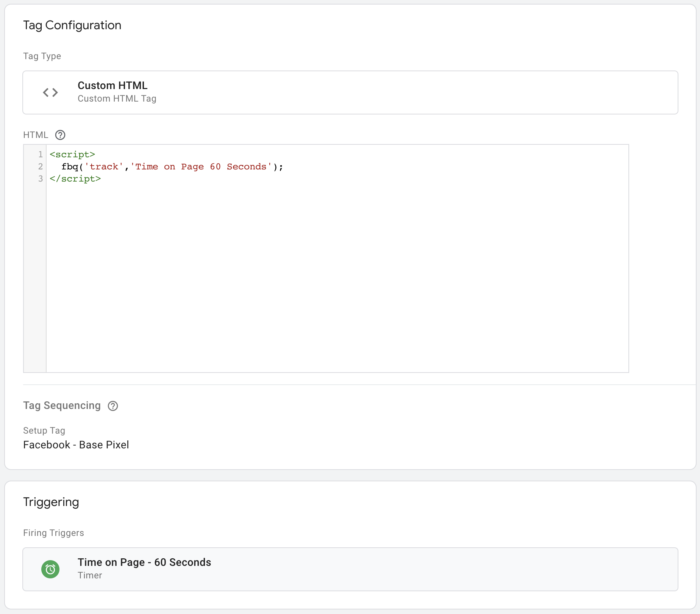
You’ll do this — and create your events — by creating a new tag. Use the Custom HTML tag type and paste your base pixel code.

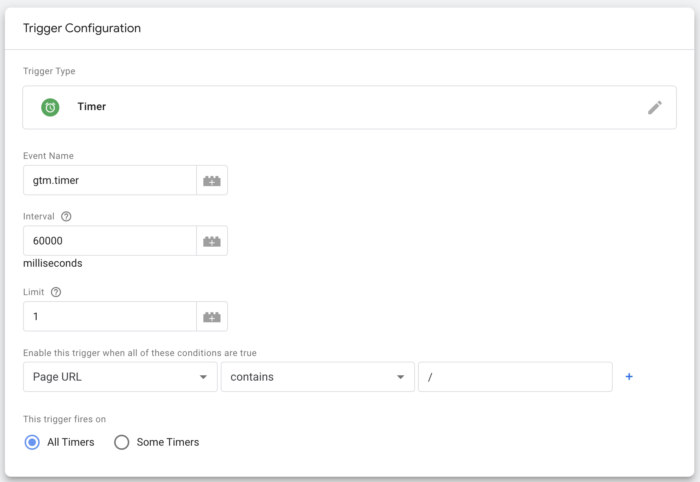
After naming it, you’ll need to configure the triggering. Use the Page View trigger and have it fire on all pages.

What is Quality Scroll Depth?

Before we create this event, we should discuss what quality scroll depth looks like. The assumption is that you’ll want to use 100% or something close to it. But, that may not be ideal.

A typical blog post may actually have a lot of content that people don’t read after the article itself. You may have comments, a footer, and maybe some other widgets and ads. The amount of scroll may be variable depending on the length of your article and the amount of comments you have.

So, keep this in mind. It’s possible that 70% is too high a barrier that may not be reached even when people read an entire article. While I use 70% in this example, it could just as easily be 50% or something else.

Scroll Depth – 70% Event

Now let’s create this bad boy.

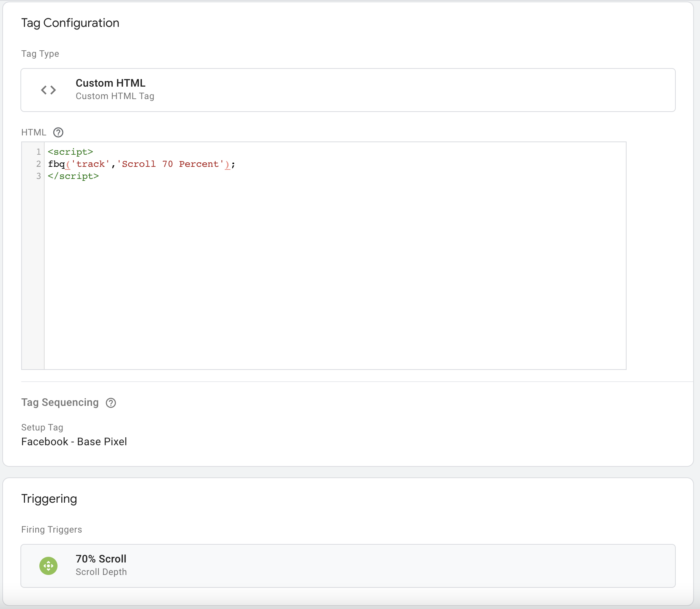
Create a new tag and name it. I’d name it “Facebook – 70% Scroll,” but name it whatever you want.

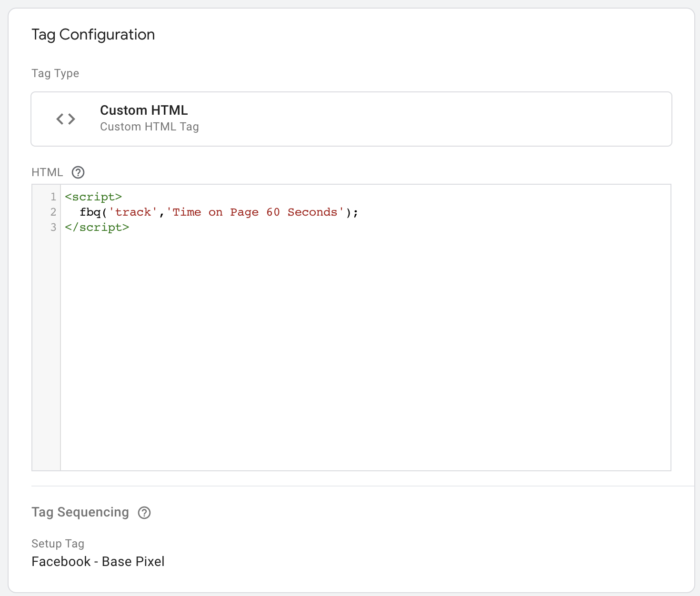
You’ll use the Custom HTML tag type again, and use the following code:

<script> 
fbq('track','Scroll Depth Event');
</script>

The name you use in the code is what appears in your Events Manager, so keep that in mind.

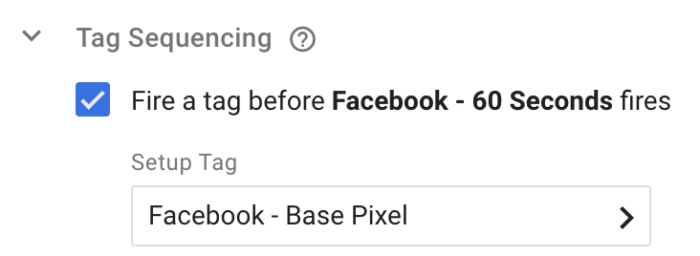
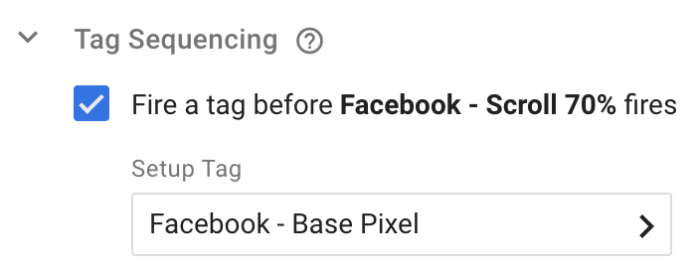
Don’t forget to turn on Tag Sequencing to have the base pixel code tag fire first. This is within the Advanced Settings under the Custom HTML.

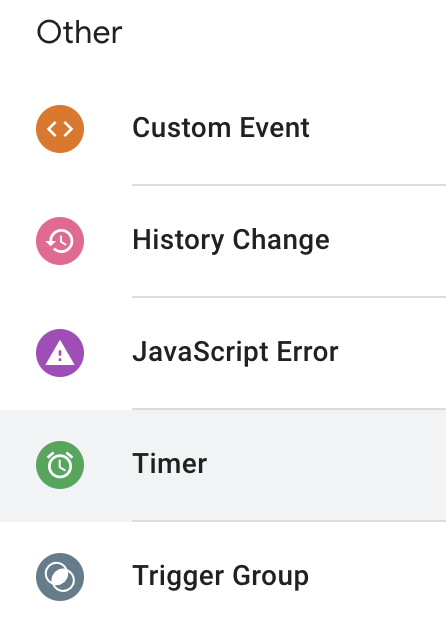
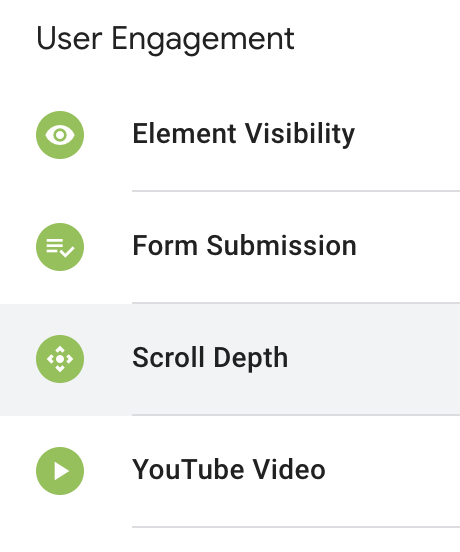
Below that, click to configure your trigger and then click the “+” to create a new one. Select the “Scroll Depth” trigger type.

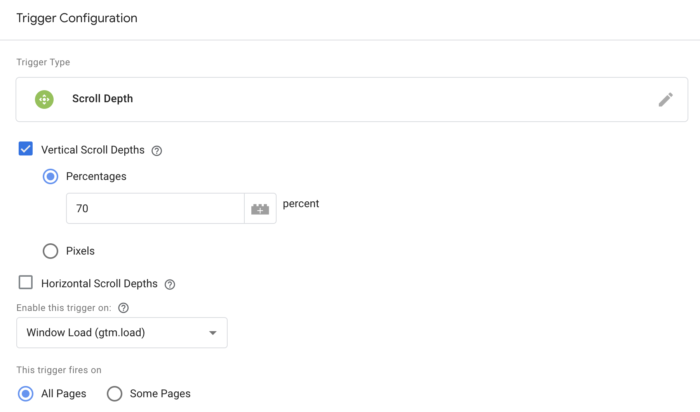
Check “Vertical Scroll Depths” and enter “70” (or whatever percentage that you want). Note that you could have tracked by pixels instead of a percentage.

The trigger will look like this…

When you’re done, your tag will look lik this…

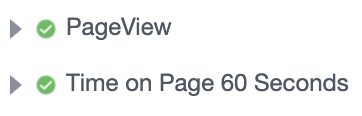
Use the Preview feature to test it out if you need to. Then publish your new tag and trigger.

Use for Reporting

This will be great for providing more context of your results in Ads Manager. While you might be able to simply add a column for your custom event to your report, there seems to be a bug that doesn’t always make this possible.

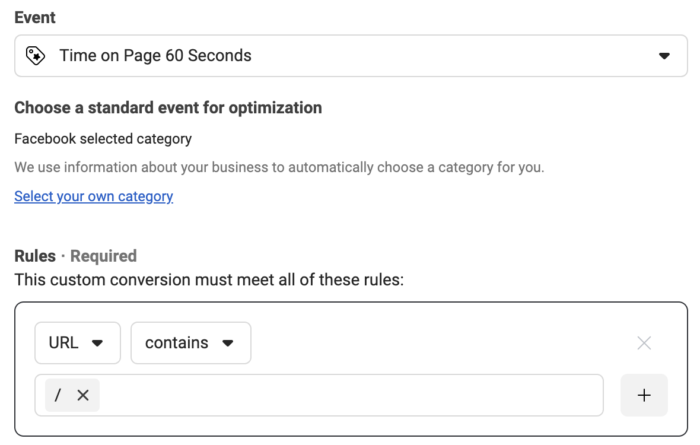
If that’s the case for you, create a custom conversion that maps to the custom event.

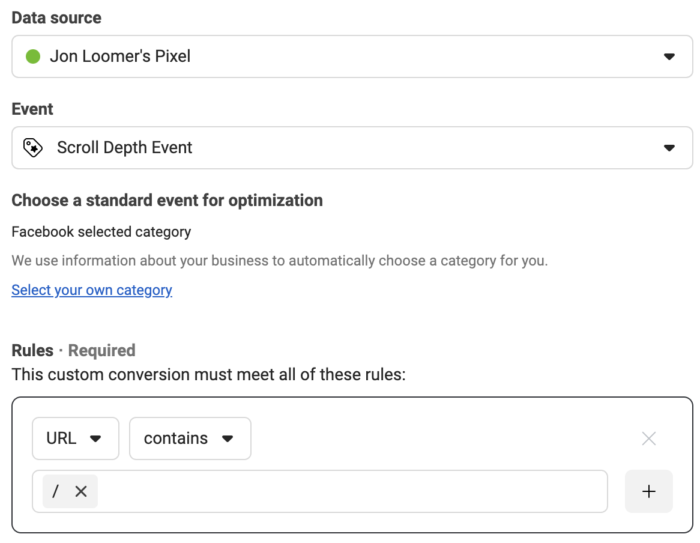
Now you should be able to add your custom conversion to your report as a new column.

Quick Tip: You may want to rank these events in your top eight for Aggregated Event Measurement if you have room. This will assure that the results are more complete.

Use for Optimization

I’ve long complained that Facebook doesn’t provide a built-in way to optimize for quality traffic. Instead, you optimize for landing page views or link clicks, and that almost always results in low-quality clicks.

But, there’s an alternative. While the jury’s out on whether Facebook actually learns from custom event activity, it’s certainly better than low-quality clicks.

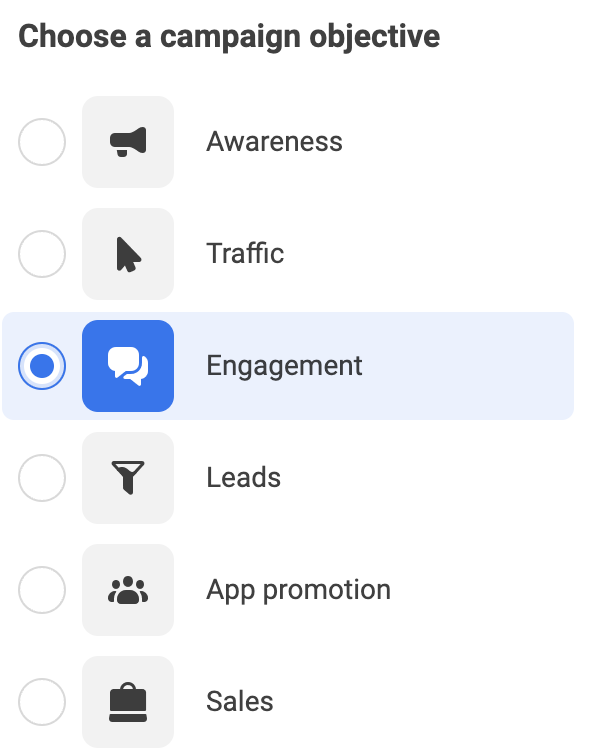
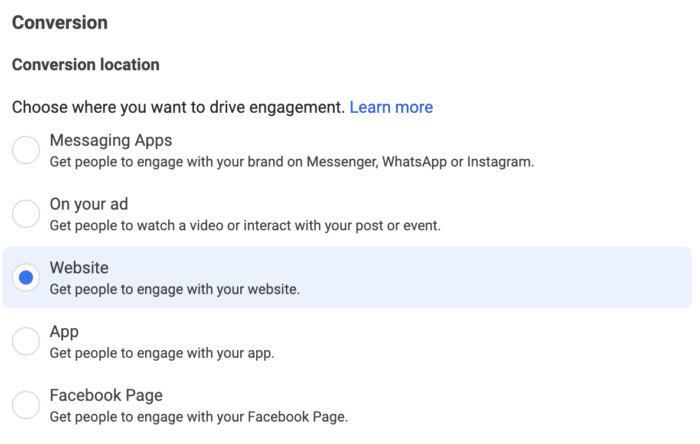
Create an Engagement campaign.

Select “Website” as your conversion location within the ad set.

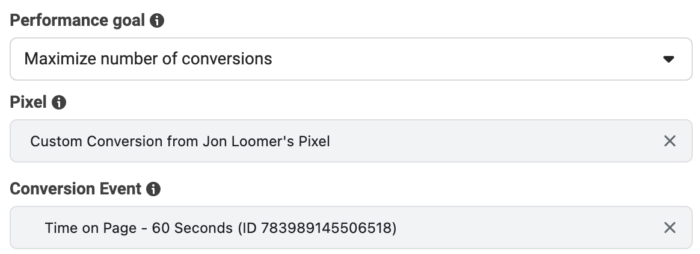
Finally, select “Maximum number of conversions” as your Performance Goal and then your pixel and conversion event.

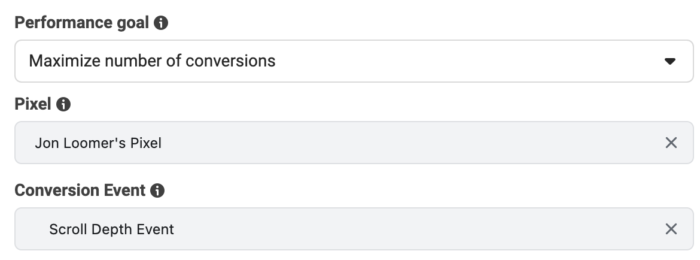
Scroll Depth will now be the focus of your “Results” column.

Use for Targeting

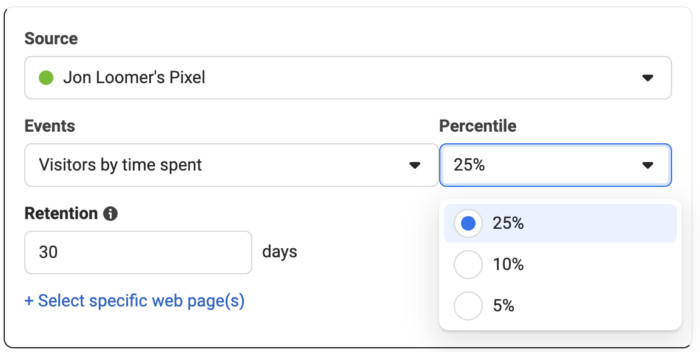
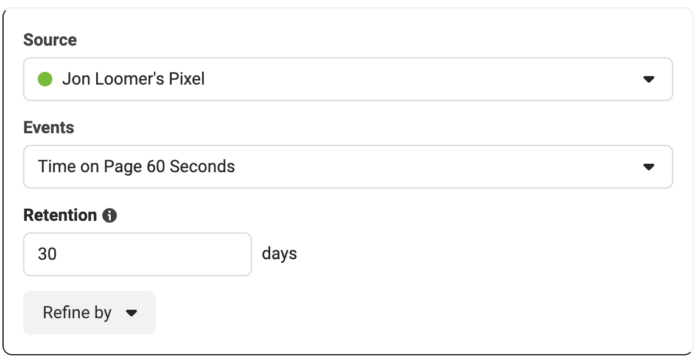
You can also target the people who scrolled on your website. Create a website custom audience that is based on your events.

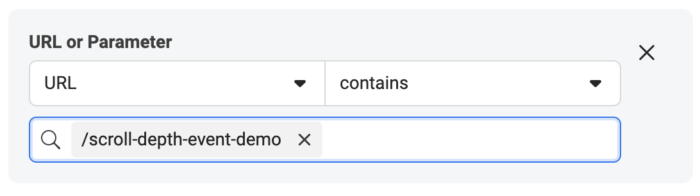
If you want, you can actually refine by the exact page that was scrolled.

Watch Video

I recorded a quick video on this, too. Check it out…

View this post on Instagram

A post shared by Jon Loomer (@jonloomer)

Your Turn

Have you ever used a custom event like this one? What do you think?

Let me know in the comments below!

The post Create a Meta Pixel Event that Fires After Scrolling 70% Down a Page appeared first on Jon Loomer Digital.

Did you miss our previous article…
https://www.sydneysocialmediaservices.com/?p=5128

Quality traffic is important. When you run Facebook ads that direct people to your website, you care whether people immediately leave or if they spend more time there. That’s why custom pixel events are so important.

What I’m going to describe is done with custom events and Google Tag Manager. Once you create such an event, you can use this for reporting, optimization, and targeting. It’s super useful, and I continue to take advantage of this today.

I wrote about these custom events nearly three years ago. But looking at that original blog post, I realize now that I made it way more complicated than it needed to be.

So today, let’s make this as simple as possible. When we’re done, I’ll provide specific examples of how this can be used as well as ways that you can make it more complicated if you really want to.

Your Base Pixel Code

I’m assuming at this point that you’re already using Google Tag Manager to manage your Meta pixel. But if you’re not, this is an important step. You’ll need to create a tag for the base pixel code that fires separately of any events.

When you create a tag, select the Custom HTML tag type. Then paste your base pixel code. It’ll look something like this…

Name it something that makes sense like “Facebook – Base Pixel.”

Then configure the triggering. You’ll select the Page View trigger and want it (presumably) to fire on all pages.

This is one of those things you can change if you really wanted to, but I’m trying to keep this tutorial simple.

Time on Page – 60 Seconds Event

Now it’s time for the fun stuff.

Create another tag and name it something like “Facebook – 60 Seconds.” The names of these things are for you only, so don’t stress over what they are.

Once again, you’ll want to use the Custom HTML tag type. Here is the code in the simplest form that you can use:

<script> 
fbq('track','Time on Page 60 Seconds');
</script>

You can add parameters if you really wanted, but let’s stick to the basics.

We’ll want to use tag sequencing and make sure that the tag for your base pixel code fires first.

The top part of the tag will look like this…

You’ll want to create a new trigger. Select the Timer trigger type.

For whatever reason, the interval is in milliseconds. So, for 60 seconds, it will need to be 60000 milliseconds. Set the limit at “1” and create a rule that will fire on every page like the one I used below.

This is another area where you could get more complicated and have it fire every 60 seconds instead of just the one time. But, again, we’re keeping this simple.

When you’re done, it looks like this…

You can use the Preview feature to test it out, but otherwise publish your changes. If you’re using the Facebook Pixel Helper Chrome Plugin, you can see the event fire on your website once you’ve been on a page for 60 seconds (you may need to clear cache).

Use for Reporting

You’ll be grateful that you have this for reporting. Customize your columns and add a new column for this custom event. Of course, I’ve found this part to be buggy since not all custom events appear within this section.

If that happens to you, we’ll need to create a custom conversion mapped to the custom event. It will look something like this…

You have to create a rule, which is why I use URL contains “/”.

Once you create the custom conversion, you should be able to add it to your columns in Ads Manager. My saved columns consist of all sorts of custom events (and custom conversions mapped to custom events) based on quality traffic actions.

Quick Tip: Keep in mind that these events aren’t unique. One visitor can view multiple pages for 60 seconds, for example. Additionally, conversions are reported by default based on the 7-day click and 1-day view attribution window. You may want to limit it to 1-day click to get a more accurate view of engagement post-click.

Use for Optimization

It’s insane that Facebook doesn’t offer the ability to optimize for qualilty website traffic. But there is an option to try.

Instead of optimizing for link clicks or landing page views (which can lead to low-quality traffic), consider using time on page as your optimization event. Here’s how you’d do it.

Use the Engagement objective.

In the ad set, select “Website” as your conversion location.

Set “Maximum number of conversions” as your Performance Goal. Then select your pixel and conversion event.

I’ve heard mixed messages on whether Facebook actually learns from and optimizes for quality traffic in this case, but I still find myself using this often when promoting blog posts.

Use for Targeting

Keep in mind that Facebook has many built-in methods for targeting quality traffic, including an option based on time spent.

But you can also create an audience based on this event.

This is a great audience for remarketing

Make it More Complicated

The event I had you create here was super simple and shouldn’t cause too many technical hurdles. If you want to make it more complicated, read my original blog post about this. In that post, I talk about using variables and firing events every 30 seconds. You can also have it fire on specific pages. The instructions in that post also include some basic parameters that I don’t use here.

And if you want to take it even further, I created an event that combined time spent and scroll depth. Admittedly, that may be taking it a bit far! But that’s how I ended up creating a broader “Quality Traffic” conversion event.

Your Turn

Do you create custom events like this one for tracking quality traffic? What do you do?

Let me know in the comments below!

The post Create a Meta Pixel Event that Fires After Viewing a Page for 60 Seconds appeared first on Jon Loomer Digital.

Did you miss our previous article…
https://www.sydneysocialmediaservices.com/?p=5050